Team Management
Add teammates to your SearchEye workspace, control which brands they can access, and set up auto-assignment so new brands are routed to the right people automatically.
All members of your team get full access to brands, settings, and orders once assigned.
Accessing Team Settings
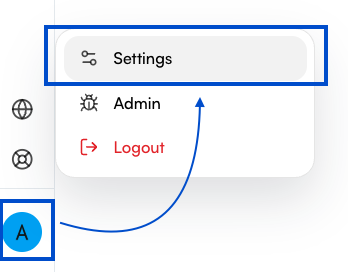
Click your account name in the bottom-left corner of the sidebar.
Select Settings from the menu.
Under Organization, click My Team.
From here, you can view all members of your workspace, invite new teammates, and manage brand assignments.
Inviting a New Team Member
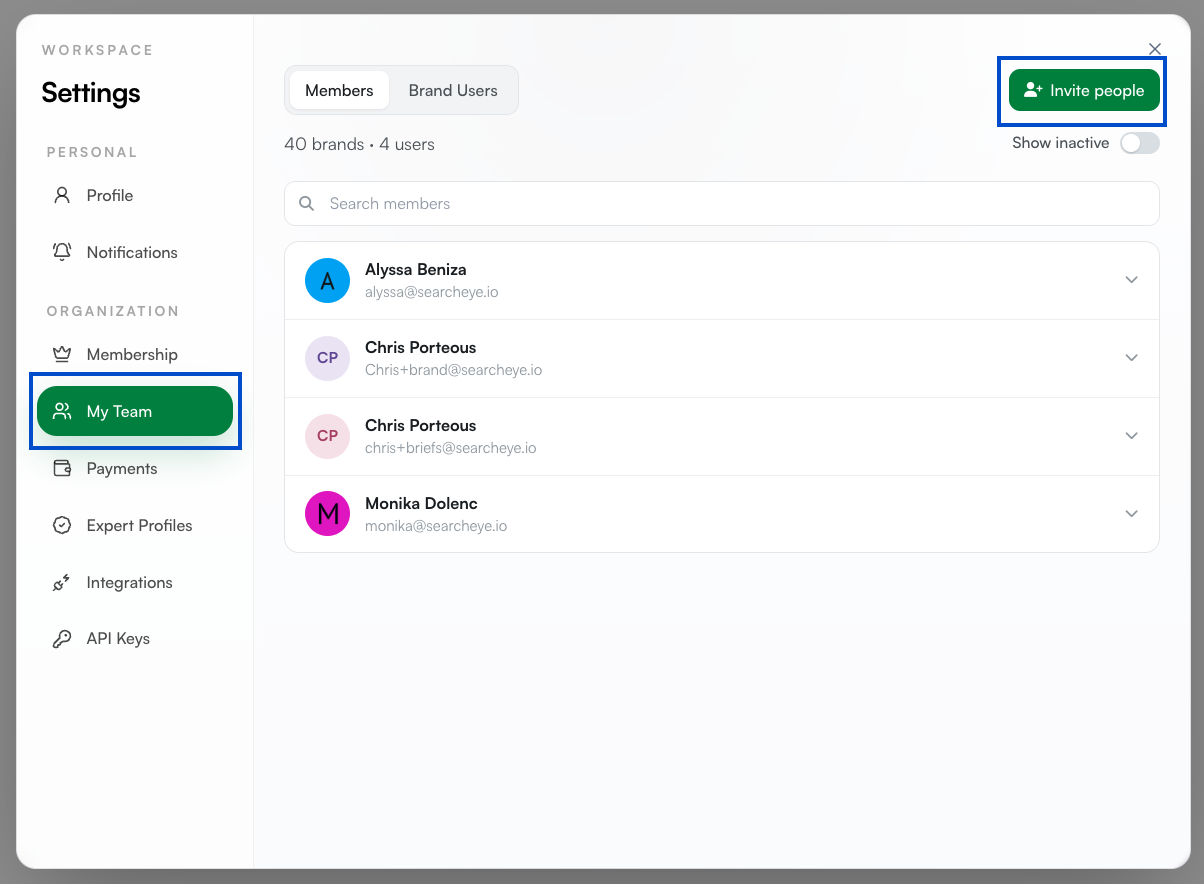
In My Team, click the Invite people button in the top-right corner.
Enter your teammate's email address in the Team member's email field.
To invite multiple people at once, click + Add another teammate.
Click Send invite.
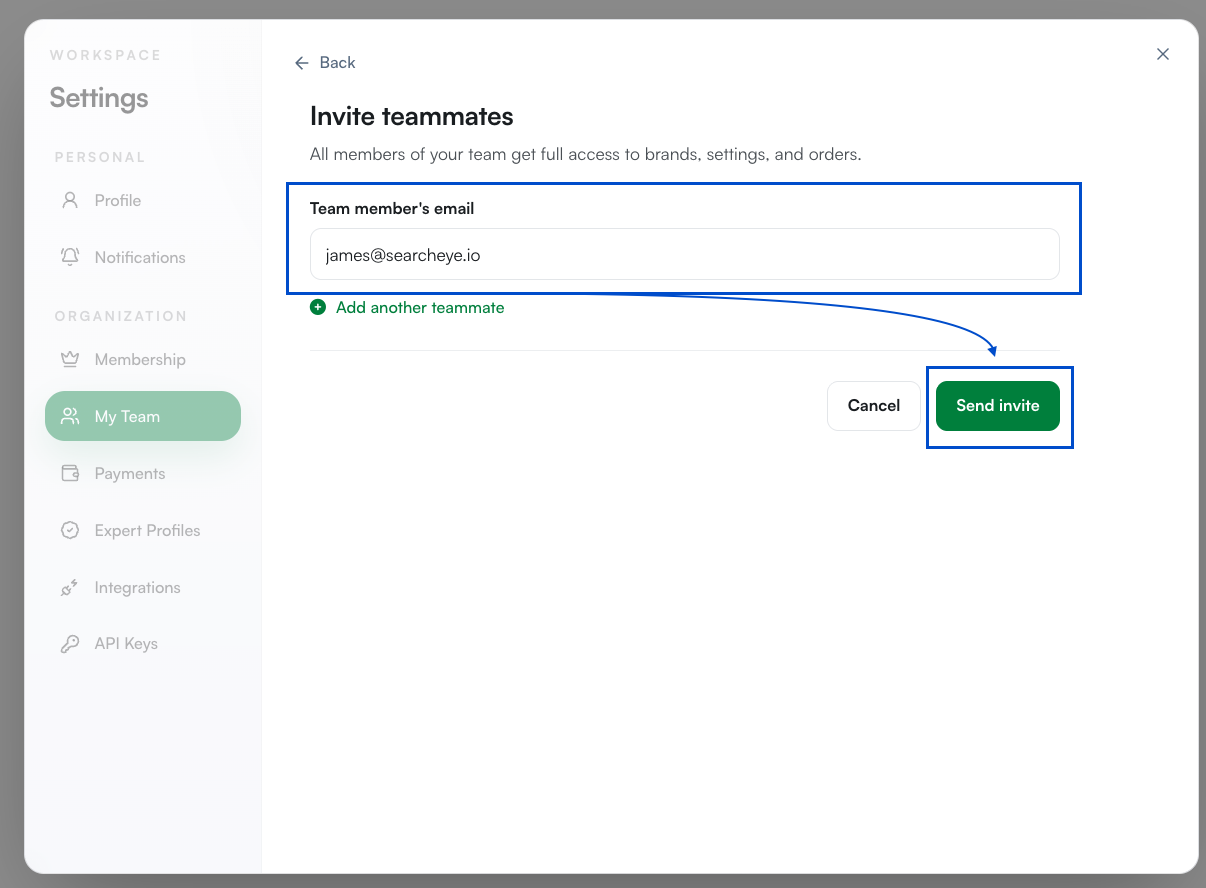
Your teammate will receive an email invitation to join your workspace. Once they accept, they will appear in your Members list.
What the Invitation Email Looks Like
Let your teammate know to keep an eye out for an email with these details:
From: links@searcheye.io
Subject: [Inviter's name] from [Workspace name] has invited you to join SearchEye
For example: "Alyssa Beniza from SearchEye Main has invited you to join SearchEye."
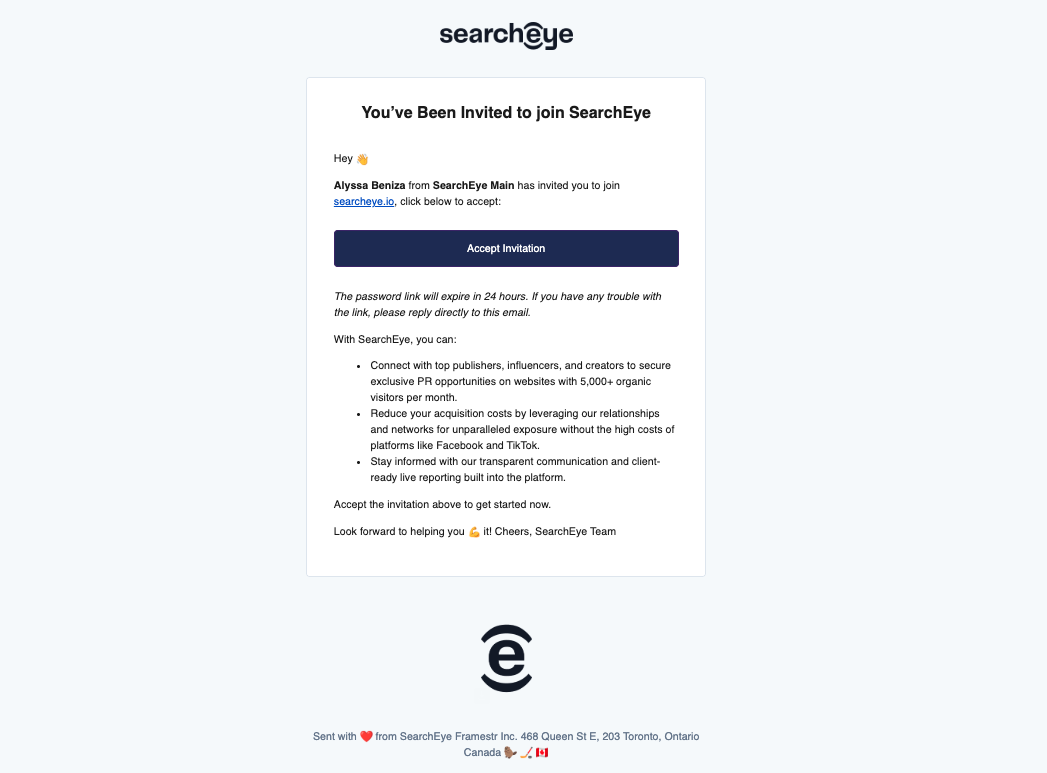
Your teammate should click Accept Invitation to set up their account. The password link in the email expires in 24 hours.
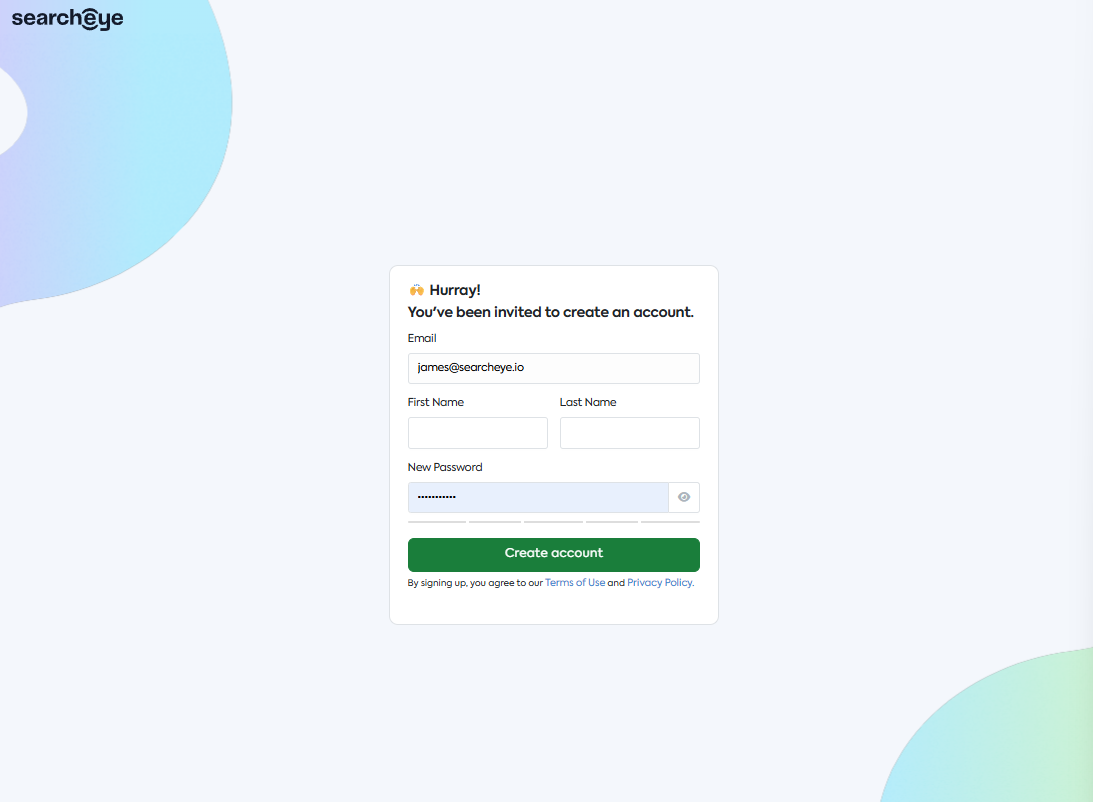
If the email does not arrive within a few minutes, ask your teammate to check their spam or promotions folder.
Auto-Assigning Yourself to New Brands
Turn on auto-assign to be automatically added to every new brand created in your workspace. This ensures you receive notifications and updates for new brands without needing to assign yourself manually each time.
In My Team, stay on the Members tab.
Click the dropdown arrow next to your name to expand your member card.
Toggle on Auto-assign new brands.
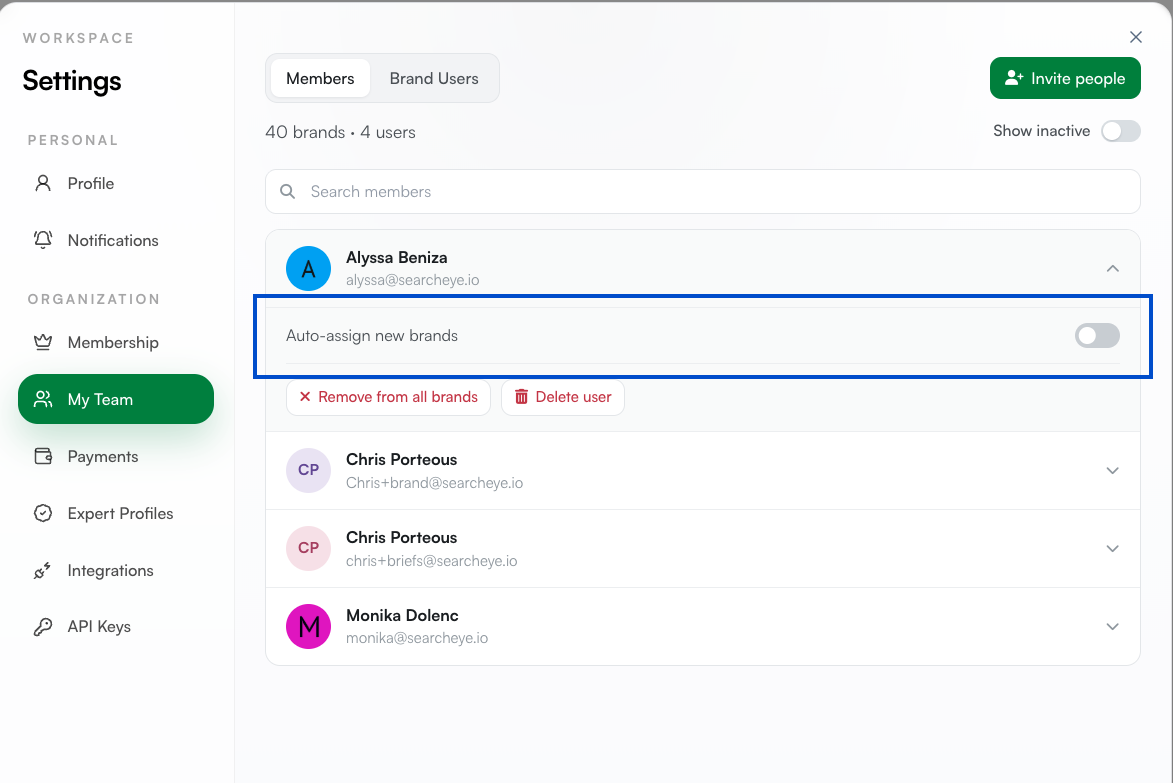
You can enable this for any team member, not just yourself. Any member with this toggle on will be added to new brands as they are created.
Bulk-Assigning Teammates to Brands
Use bulk assign to add one or more teammates to multiple brands in a single step, instead of assigning them brand by brand.
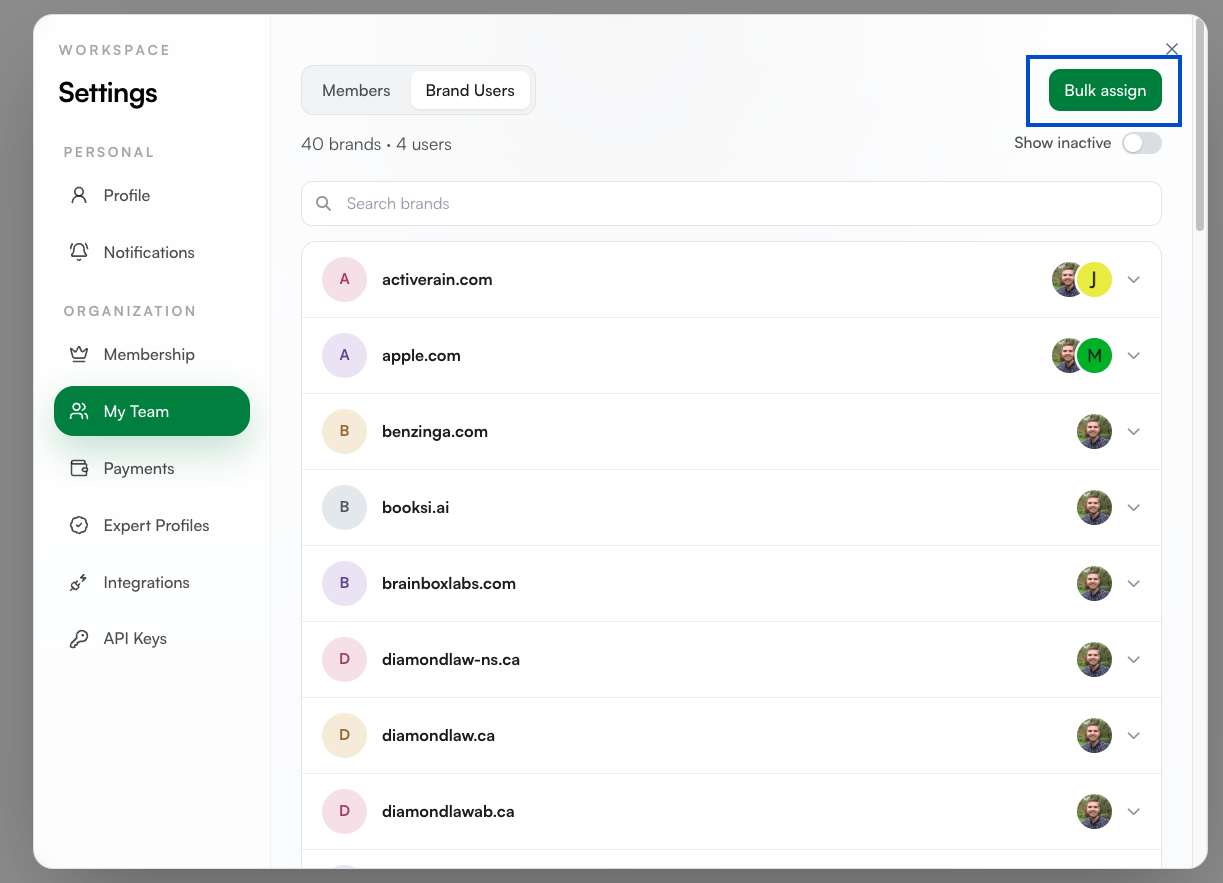
In My Team, switch to the Brand Users tab. You will see a list of all brands in your workspace along with the users currently assigned to each.
Click the Bulk assign button in the top-right corner.
In the Users column, select the teammate(s) you want to assign. Use the search bar to find a specific user, or check All users to select everyone.
In the Brands column, select the brands you want to assign them to. Check All brands to assign them to every brand at once, or select individual brands as needed.
Review the summary at the bottom (for example, "Assign 1 user to 40 brands"), then click Assign.
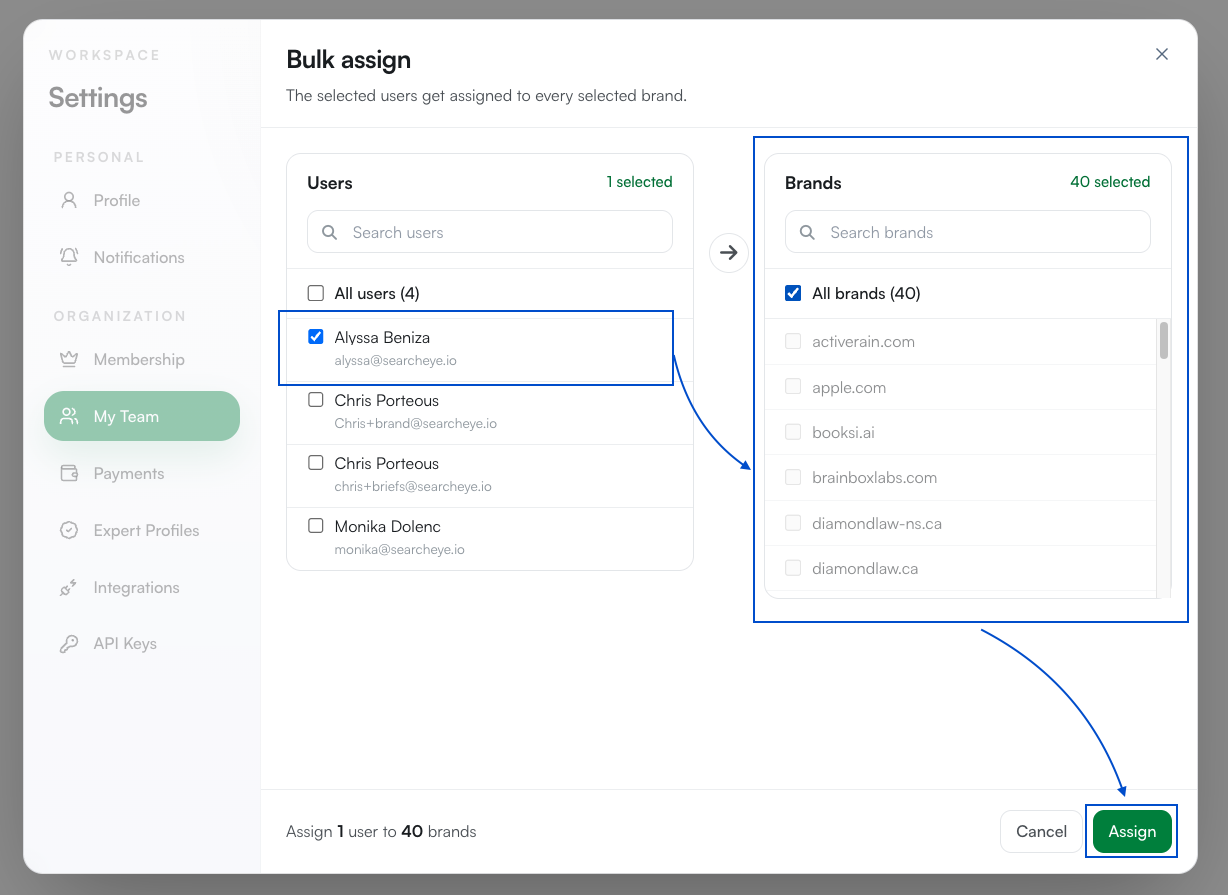
The selected users will immediately gain access to every brand you selected.
Managing Existing Members
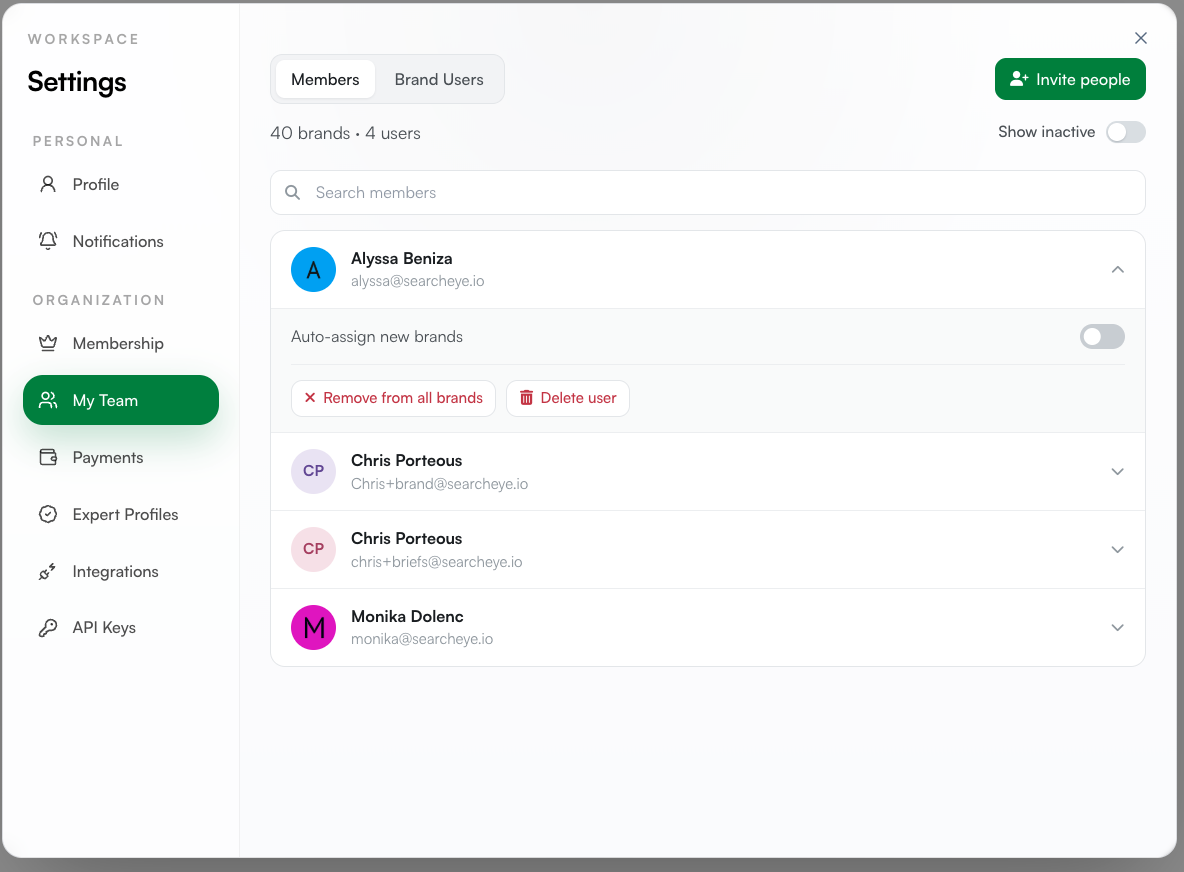
Expand any member's card in the Members tab to:
Toggle Auto-assign new brands on or off for that member
Remove from all brands to revoke their brand access while keeping them in the workspace
Delete user to remove them from the workspace entirely
To view inactive members, use the Show inactive toggle in the top-right corner.
Frequently Asked Questions
Who can invite new team members?
Any workspace member with access to Settings can send invites from the My Team page.
What is the difference between Members and Brand Users?
The Members tab lists everyone in your workspace by user. The Brand Users tab lists every brand and shows which users are assigned to each, which is the view you use for bulk assignment.
Will bulk assign remove existing assignments?
No. Bulk assign only adds the selected users to the selected brands. Existing assignments are not affected.
What happens when auto-assign is off?
New brands will need to be assigned manually, either from the brand itself or through Bulk assign.